The reset process will restore the factory default settings into the range extender after which you need to reconfigure the range extender just like a fresh one. To save yourself from reconfiguring the range extender, you can create a backup of the current settings that you can restore later.
Here are the scenarios, because of which a user has to restore the default settings
- If you are experiencing a delayed or intermittent connection while connecting to the range extender.
- If you want to reinstall the range extender after an unsuccessful attempt
- If you are unable to access the extender.linksys.com interface of the range extender.
- The range extender is full of bugs and causing slow data transfer issues.
- If the LED of the range extender is not blinking or solid while turning on the range extender.
- If the range extender suddenly disconnects and hangs while transferring the data.
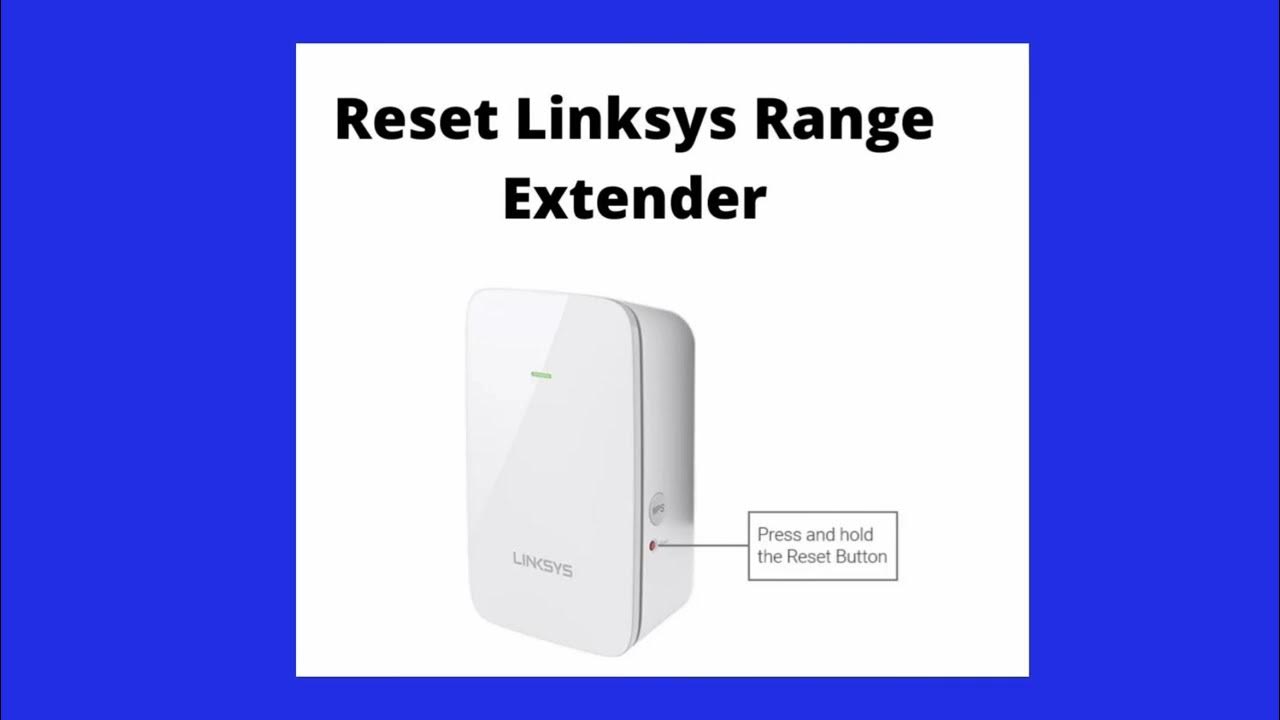
Follow the below steps to perform the reset process in the range extender
- Open a browser on the computer and type extender.linksys.com in the address bar.
- Press enter and the default login window appears on the screen.
- Type “admin” on the username field and type the password you assign during the setup process.
- Click Login after typing the correct credentials are typed in the provided fields.
- The extender.linksys.com menu Dashboard appears on the screen.
- From the main navigation panel, go to the Administration tab, select the Factory default settings.
- Click the Restore Factory default option to start the reset process.
- When the reset process gets done, unplug the range extender from an electric outlet and leave it for around 30 seconds.
- Plug the device back in when the time is confirmed.
Note: To avoid yourself from reconfiguring the range extender, you can create a backup of the current configuration settings and restore them later when the process is done. You can perform the backup and restoration process using the extender.linksys.com interface.
How to connect to the Linksys range extender.
A user can connect to the Linksys range extender through several methods. The most convenient method to connect to the range extender is through the WPS button. Although manual method is also there with which you can connect to the range extender, its time consuming and effort taking process.
Follow the below steps to connect to the Linksys range extender using the WPS button
- Connect the range extender to the available power outlet near the main router.
- Wait for the Power LED to turn amber that shows the extender has successfully turned on
- Press and hold the WPS button on the range extender.
- Now go to the router and press the same WPS button.
- Note: Make sure you press the WPS button of the router within 60 seconds.
- Wait for a couple of minutes to allow the connection to get established between your router and the range extender.
- When the Wi-fi LED blinks yellow, it means the connection got established.
Note: For the manual connection process, a user must have a cable with which he will create a physical connection between the range extender and the router. You can also take the help of the Quick setup guide that comes along with the device to help you during the connection or setup process.
How to update the firmware of a Linksys range extender?
The firmware of the range extender is updated to enhance the performance level of the device and the network. A new firmware adds up new features, upgrades the existing features, and removes the bugs from the range extender. You can either update the firmware of the range extender through a manual method or directly through the extender.linksys.com interface.
Note: Users are recommended to read the release note of new firmware to know the settings that will get erased during the update.
- Open a browser on the computer and type extender.linksys.com in the address bar.
- You can also type 192.168.254.1 as the URL of the browser.
- Press enter and the default login window appears on the screen.
- Type “admin” on the username field and type the password you assign during the setup process.
- If you haven’t changed the default password, type “admin” in the provided field.
- Both the credentials fields are case-sensitive.
- Click Login after typing the correct credentials are typed in the provided fields.
- The extender.linksys.com menu Dashboard appears on the screen.
- From the main navigation panel, go to the Advanced tab, select the Management option.
- Click the Firmware update tab, the page of Firmware update displays.
- Scroll down the firmware update page and click on Check Online option.
- If a new firmware is available for the range extender, a dialogue box appears on the screen.
- Click Upgrade then click Yes to initialize the update process.
- Note: Do not interrupt the update process by any means, it may lead to failure of the process.
- When the update process is done, the extender automatically reboots.
- You can confirm the Firmware update of the range extender by the Status tab of the extender.linksys.com menu page.
Note: You can create a backup of the settings that will get erased during the update process. You can restore the deleted settings using the web interface of the Linksys range extender. Make sure you save the backup settings somewhere safe from where you can easily access them during the restoration process.